
Technorati 站內搜尋器教學(UTF-8)
因 Google登記網站到登錄搜尋需要一段時間,
這段期間中,為了找編碼 UTF-8可用之站內搜尋器,著實花了一翻心血。
( MSN, Openfind......等均編碼不同,無法使用 )
後來承蒙 PTT Blog版的網友建議,使用 Technorati 站內搜尋器
從註冊到 20hr後,它的搜尋能力剛從 0進展到首頁資訊
以下其【站內搜尋器】註冊教學,給有需要的網友參考
PS.參考連結 Google SiteSearch 站內搜尋教學
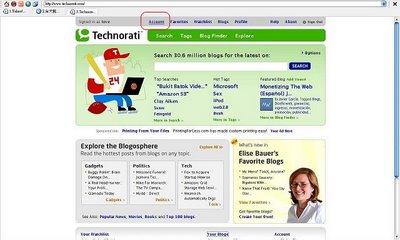
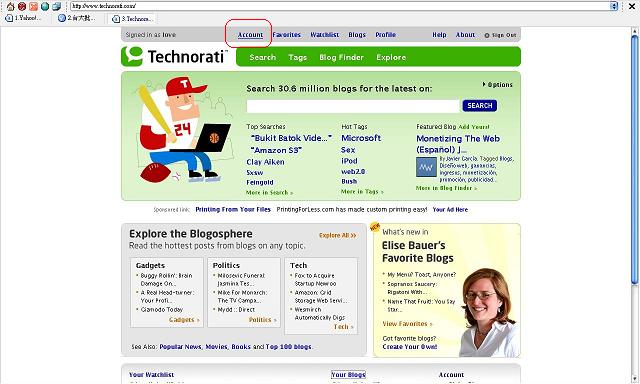
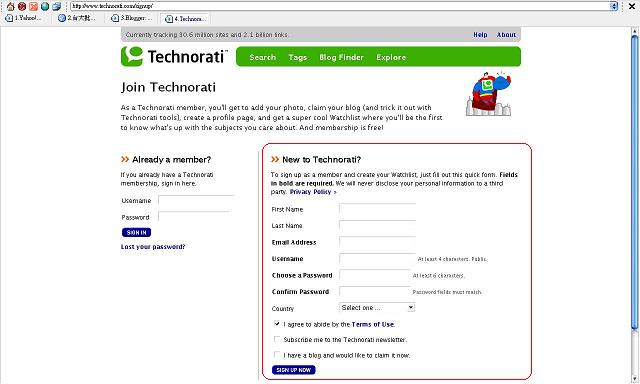
1. 開啟 Technorati
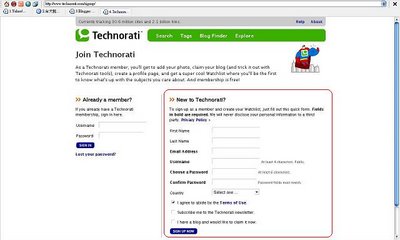
2. New to Technorati? 填寫資料註冊 (Sign Up)
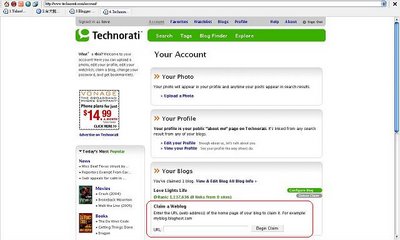
3. 上方灰色工具列 Account - Your Blogs - Claim a Weblog
輸入您網站的 URL - Begin Claim
4. 依網站步驟做
(1) 會要將一行 java碼放在網站的範本中,供其檢核
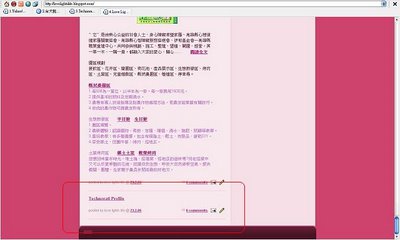
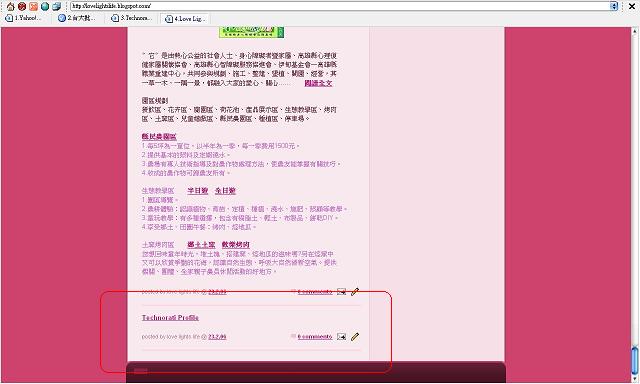
(2) po一篇新文章,內容中放入它指定的連結
其中,步驟的每一段落要等其認証
( 我那時都要等幾分鐘後,網站才會讀到 )
5. Claim Your Weblog ( 步驟 4 ) 完成後
上方灰色工具列 Account - Your Blogs 應該就可以看到:
自己的 Blog名稱
Rank: x,xxx,x (x links from x sites)
在上兩行左邊有個綠色小圖示 Configure Blog 點進去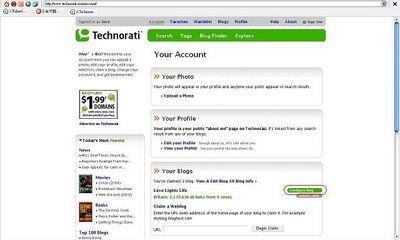
把 Blog Information 填完,在其下方有 Configure Embed Display
勾選
Show Technorati Embed on my site -Include: Technorati Search Box
下方還有兩個選項,非必要,看個人喜好
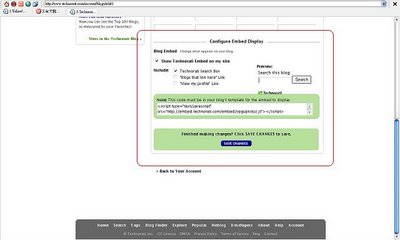
之後將
Note: This code must be in your blog's template for the embed to display.
方框中之程式碼複製到 Blog範本中 ( 我的是在 sidebar )
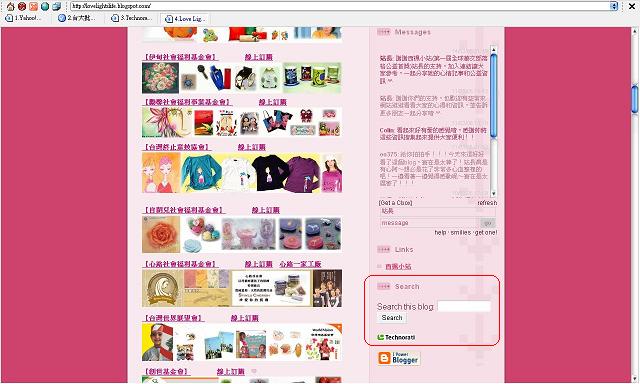
6. Blog儲存範本變更,重新發佈 <-- 完成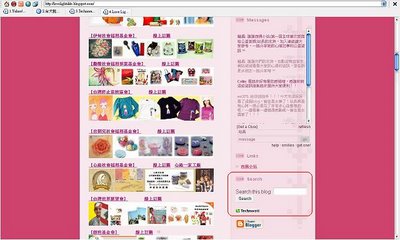
這段期間中,為了找編碼 UTF-8可用之站內搜尋器,著實花了一翻心血。
( MSN, Openfind......等均編碼不同,無法使用 )
後來承蒙 PTT Blog版的網友建議,使用 Technorati 站內搜尋器
從註冊到 20hr後,它的搜尋能力剛從 0進展到首頁資訊
以下其【站內搜尋器】註冊教學,給有需要的網友參考
PS.參考連結 Google SiteSearch 站內搜尋教學
1. 開啟 Technorati
2. New to Technorati? 填寫資料註冊 (Sign Up)
3. 上方灰色工具列 Account - Your Blogs - Claim a Weblog
輸入您網站的 URL - Begin Claim

4. 依網站步驟做
(1) 會要將一行 java碼放在網站的範本中,供其檢核
(2) po一篇新文章,內容中放入它指定的連結
其中,步驟的每一段落要等其認証
( 我那時都要等幾分鐘後,網站才會讀到 )
5. Claim Your Weblog ( 步驟 4 ) 完成後
上方灰色工具列 Account - Your Blogs 應該就可以看到:
自己的 Blog名稱
Rank: x,xxx,x (x links from x sites)
在上兩行左邊有個綠色小圖示 Configure Blog 點進去

把 Blog Information 填完,在其下方有 Configure Embed Display
勾選
Show Technorati Embed on my site -Include: Technorati Search Box
下方還有兩個選項,非必要,看個人喜好
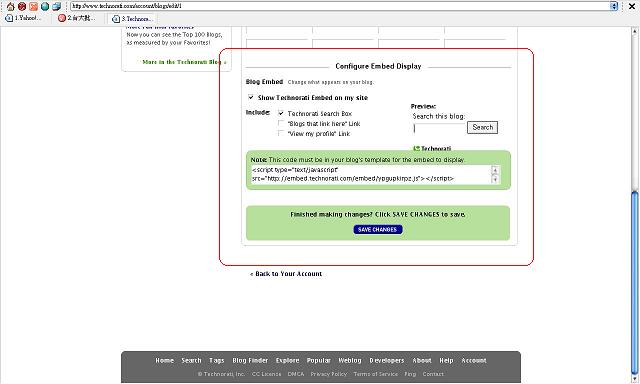
之後將
Note: This code must be in your blog's template for the embed to display.
方框中之程式碼複製到 Blog範本中 ( 我的是在 sidebar )
6. Blog儲存範本變更,重新發佈 <-- 完成
posted by Love lights life!! @ 12:57
![]()
![]()


0 Comments:
Post a Comment